Monday, November 14, 2016

Harlequin (Apricot and Walnut Bars)


This is a recipe from Romania, which everyone loved every time I made it. In the United States, the reaction has been the same. In 2004, the recipe was a finalist in the Indianapolis Star cookie contest. You are going to enjoy it too, I am certain!


Harlequin recipe


Dough for the layers:

150 g sugar (5 1/2 oz)
300 g butter (10 1/2 oz)
1 tsp baking powder
1 egg
400 g all purpose flour (14 oz; plus some additional flour for dusting the workspace)


Mix together the butter and sugar until fluffy, then add the egg, baking powder, and flour. 


Make the dough into a big ball, then divide it in 4. 


Put it in the refrigerator, covered with a paper towel, for 30 minutes or until it is cooled. Take 1 ball out and stretch it on a floured working top with a rolling pin and make a rectangle of 9 x12 inches. The dough should be cold but not hard before stretching it. Try not to use a lot of flour, since that will change the consistency and the taste


Roll it up on the rolling pin and transfer it onto the baking tray. 


Bake it at 350° F (180° C) for 10-12 minutes. It is ready when it is slightly brown at the edges, as in the picture below. Carefully remove it from the tray while it is still warm, and place it on a rack to cool. You may need to gently slide a knife or spatula between the cake layer and the pan to get it to slide off easily.


Repeat the steps above with the rest of the dough. When the baked sheets are cold, spread apricot jam on one, then place another cake layer on top and repeat, except on the top layer, which will be covered with icing.


Icing:

150 g (5 1/2 oz) chopped walnuts  
4 egg yolks
150 g (5 1/2 oz)  powdered sugar
vanilla essence 


In a pan mix together 4 egg yolks with 150 g (5 1/2 oz) powdered sugar (preferably granulated sugar ground at home into powdered sugar, not sugar bought in powdered form from the store, as it should not have cornstarch in its composition). Place this pan on top of/into another pan with boiling water, and keep stirring until the composition is hot and looks creamy (see picture below.) Then add a few drops of vanilla essence and stir.


When it is done, pour the icing onto the top layer of the cake and immediately scatter the walnuts on it, pressing them down with your palm. 


After a few hours, you can cut it into small bars. 


Note: Making the layers can be really hard and frustrating the first time you try, but don't be discouraged! With practice, this is going to become a favorite recipe that everyone will ask you to make over and over again. 


Saturday, August 27, 2016

Plum dumplings


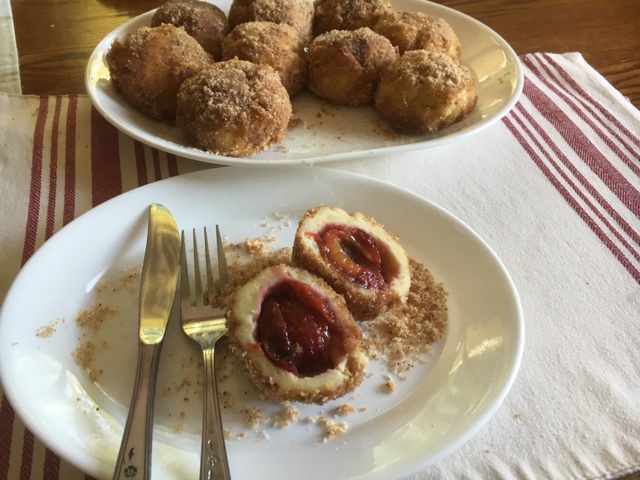
For this recipe you need prune plums, which should be hard, small (not much larger than the size of a walnut) and ripe (the colour shoud be purple-blue). Here is a picture of what I used for this recipe.

Ingredients:

1 lb prune plums (500g) 12-15 pieces
1 1/2 lb potatoes (700 g)
10 oz (250 g) all purpose flour (plus extra flour to coat the work surface when making the dumplings) 
2 eggs
4 Tbs. vegetable oil
4 oz (100 g) butter
6 oz (150 g) plain breadcrumbs
6 oz sugar (150 g)
Salt
Vanilla sugar or vanilla essence

Instructions:
Wash and boil the potatoes for 25-30 minutes. The best potatoes are red ones, but any that are sticky rather than fluffy after boiling will work. Drain them and allow them to cool. After that, peel and mash them, adding salt. Then add the vegetable oil. Beat the 2 eggs, then add them to the potatoes as well. Next add the 10 oz of flour. Stir the mixture until all ingredients are incorporated. The dough should be sticky, as it is in the picture below. 

In the meantime, wash and dry the plums. Then open them by squeezing the ends together in order to remove the pits. If you cannot remove the pits in this way, cutting them part way is also an acceptable method of removing the pits from the plums. But ideally the two halves of the plum should not be separated from one another.

With a spoon, take a portion of the dough and place it on a floured surface. Flatten it into a circle as you see in the photo below.


Place a plum in the center of the dough circle and then pull up the dough around it to cover it.


Do likewise with all the plums.


It takes skill and practice to finish the dough and the plums at the same time! The first time you try the recipe, there is a good chance that you will have plums or dough left over.

While you are making the dumplings, put a large (6-8 quart) pot of water to boil. Once the dumplings are prepared, and the water is boiling, place a batch of dumplings in the water. Gently keep them moving with a slotted spoon to ensure that they do not stick to the bottom. Boil for 15 minutes at medium-high temperature. 


After they have been boiled, they need to be rolled in a mixture of breadcrumbs and sugar. And so either before you start making the dumplings, or while you are waiting for the dumplings to boil, melt the butter in a pan on low heat, and add to it the breadcrumbs, sugar, and vanilla. These ingredients are just being toasted lightly, so be careful not to burn them! When the dumplings are ready, place one or two at a time in the breadcrumb mixture and roll them through it. Continue until all the dumplings have been coated. Don't worry if you have breadcrumb mixture left over - it is good to spoon more of the mixture over dumplings when you eat them.


Serve them warm. We just had them basically as dinner and dessert all rolled into one!


Wednesday, May 25, 2016

Bagels


I was introduced to eating bagels in New York, which is arguably the home of the world's best bagels. But I learned how to make bagels as good as the ones I had eaten in New York from an Australian friend! Being able to make my own bagels revolutionized my life, although it also made it harder to enjoy storebought alternatives many of which contain preservatives or for whatever reason simply don't taste the delicious way that bagels ought to.

Below you will find instructions for the two main kinds of bagels that I make, cinnamon raisin and onion. You can also omit those options and make plain bagels, which I also sometimes do. But the basic recipe can be adapted, adding poppy seeds, sesame seeds, or cinnamon and sugar on the tops of them, or chocolate chips inside them, or any number of other variations.

Ingredients:

8 cups high-gluten bread flour such as Baker's Roses or King Arthur (1600 g)
1 tablespoon (1 oz/25g) yeast
3 tablespoons (3 oz/75g) sugar
1 tablespoon (1 oz/25g) salt
2 eggs
2 1/2 mugs (3 1/2 cups) of warm milk
1 serving spoonful of yogurt
1/4 cup vegetable oil

For cinnamon raisin bagels add:
1 1/2 cups of raisins
2 tablespoons cinnamon

For onion bagels:
2 spoonfuls dried onion

1 beaten egg for glazing


Instructions:
Mix the warm milk and yeast together with most but not all of the flour (leave approximately a cup set aside). Add the eggs at room temperature, yogurt, salt, and sugar. Put your stand mixer on speed 1 and mix it for 6 minutes. Then warm the oil and add it little by little while the mixer is still going. The consistency of the dough should be hard like play-dough, harder than for bread. If it is not hard enough, add the remaining flour, or even more if necessary.

When the dough is shiny and not sticky any longer, divide the dough in two parts, 1/3 and 2/3 of the total amount. Place the 1/3 sized portion in a separate bowl, and leave the 2/3 sized portion in the mixer. To the 2/3 portion of dough, add the cinnamon and raisins, and keep mixing at speed 2 until they are completely incorporated. To the other 1/3 add the onion. There is no need to place it back in the mixer, although if you have a second bowl for your stand mixer you may do so. Otherwise mix it by hand until the onion is incorporated.


Cover each bowl with a damp paper towel, and let the dough rise in a warm place for an hour or until it has doubled in size. Then place it on a wooden work surface, starting with the cinnamon raisin batch, and divide it into 12 pieces of roughly equal size. Each should weigh around 8 oz (200g). 


Above is a photo of the phases that the separate balls of dough go through. After separating the pieces into balls, roll them into cylinders/sticks roughly 6-7 inches in length, and then join them into rings, dipping the ends into a dish with a tiny amount of water in it, just enough to moisten them so that they adhere but not so much as to make the dough become more generally sticky. Press the ends together as shown below.


Repeat the process described above with the onion dough, which should yield six bagels. Let all the rings rise on trays dusted with flour for an hour. 


After that, fill a large pot roughly 2/3 full with water. Salt the water slightly and bring it to a boil. When the water is boiling fervently, place 3 bagels at a time in the water and boil them for 5-6 minutes, stirring them around in the pot occasionally. Then remove them with a slotted spoon and return them to the trays they were on, to drain. Repeat with as many of the bagels will fit on your baking trays (in my case that is about 9 of them). 


After they are drained, glaze them with beaten egg. Grease the baking trays with butter and place the bagels on them. Place them in an oven that has been preheated to 375° F (190° C) for 35 or 40 minutes. When they are done remove them and repeat the above process with the next batch, boiling, draining, glazing, and baking them as described. This entire process should be done very quickly. 


The photo above shows what they look like before they have been placed in the oven, and below is a photo of them after they have been baked.


That's what the final product looks like. Once they have cooled at least a little, you can eat them with cream cheese and lox, jam, or whatever else you like to put on them. You can freeze them and defrost them when you need them and they will be as good as if they were fresh out of the oven. I recommend slicing them before freezing them - then you can defrost them in the toaster.

Let me know how yours turn out!


Sunday, May 8, 2016

How to make maple syrup

I

Maple syrup is the best thing you will want to buy from a gift store when you come for a visit to North America. As one might expect, genuine maple syrup comes in small bottles and is quite expensive. As an alternative, you can buy the artificially flavored kind that most Americans use, which is found in just about any supermarket. Some people prefer the latter, since it is sweeter and has more flavor. 

I prefer to make my own homemade maple-flavored pancake syrup, since I use sugar (as opposed to corn syrup, which is the sweetener in most store bought ones). It is a simple, quick, and guaranteed recipe. Here it is what you need:

7 oz (200 g) brown sugar (dark or light)
7 oz (200 g ) granulated white sugar
1 cup ( 220 ml) water 
Imitation maple flavour

Place all the sugar and water in a small sauce pan and turn the heat on medium high. Stir continually until all the sugar is dissolved.


Let it boil for 5-6 minutes until the foam disappears. Take it off from the heat and let it cool for 1-2 minutes. Add 1 teaspoon of maple flavour and stir it in. Have ready a 16.9 fluid oz (500 ml) bottle with a lid (ideally one like that in the picture, designed to be a syrup dispenser) and pour in the syrup hot. Put the lid on. It can be used immediately for pouring over pancakes, french toast, or even maple-glazed ham. The consistency is more like real maple syrup, as opposed to the kind made with corn syrup which is thicker. 

It can be stored it for a month or two in the kitchen cabinet - but it is so good that it is unlikely to ever last that long!


Saturday, February 27, 2016

Yorkshire Puddings


There are people outside of the United Kingdom who have never tasted a Yorkshire Pudding. I was one of those people until I lived in Britain and first enjoyed eating them, and then learned how to make them. They are a real treat that deserves to spread to other parts of the world. 

They are traditionally accompanied with roast beef and vegetables. These are not sweet puddings, if that is what the word "pudding" means to you. These are more like american biscuits that get eaten with gravy, but they are hollow inside, light and fluffy but also crispy on the outside. They are best when eaten freshly-made. Even some people in England struggle to get them to turn out just right. This recipe, if followed precisely, should work every time. I was taught by an English friend, and then adapted the recipe for the tray that I have. You can use a standard non-stick muffin or cupcake tray to make them.

Ingredients:

3 large eggs
1 1/2 cups milk
2 cups all-purpose flour
A pinch of salt
Vegetable oil for baking

Preheat the oven to 450° F or 230 ° C (it makes sense to do this after you have roasted the beef). Put approximately a teaspoon of oil in each of the twelve spots in the tray and place the tray in the oven for at least 5-7 minutes at that temperature.

In the meantime, mix the eggs, milk, flour, and salt with a mixer until it is homogenized into a batter. 

Take the tray from the oven and very quickly (this is the key to them turning out perfectly!) pour batter in each spot in the tray, until it reaches almost to the top, as shown in this photo.


Return the tray to the oven and leave it in for 30-35 minutes. When they are done, they should look like this:


Take them out of the oven when the vegetables, gravy, and other items are ready to be served. My husband always makes a slit in the top of each one on his plate with his knife, so that the gravy goes inside when it is poured over them. 


Sunday, February 14, 2016

24 years ago, on Valentine's Day

This is a blog for recipes, but hopefully you will enjoy this story that I am sharing, even though it has nothing to do with food, as "food for thought" on this occasion.

I still remember vividly the conversation I had with my husband (then my fiance) 24 years ago today, on Valentine's Day, a holiday we didn't really celebrate in Romania then, although it has since started to catch on. He still lived in the UK, where we had met as students, while I had since had to return to Romania. And so we spent a lot of time writing (letters back then, not e-mails) and talking on the phone as often as we could. When he called that day, he said "Happy Valentine's Day," and then thought that I was being sarcastic when I replied by saying "Thank you for the flowers." But I was being sincere. He then asked, with confusion in his voice, "Wait - you got flowers?" Then it was my turn to be confused, at his confusion. I think you will enjoy the story of our very different experiences, and the surprising way they fit together.

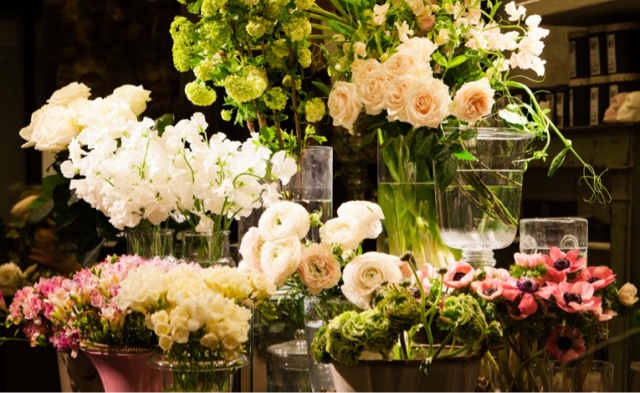
Romania did not at that time have good connections with the international companies that allow one to send flowers anywhere in the world. But apparently my fiance had managed to arrange something, because I got a phone call, telling me that a local florist in my town had been trying to deliver flowers to my apartment but had not found me home. They asked me to come to their shop and choose the flowers I wanted - a very large amount, since British currency went very far in Romania in those days, and what might have bought a nice bouquet with shipping in the UK would get you too many flowers to count in Romania, basically everything she had in the store that morning! Indeed, the woman at the store wondered if I was somebody famous and important, to be getting so many flowers. 

My then fiance had a different perspective on what had happened. He had placed an order for a bouquet of flowers to be sent to me, using a company in the UK which said they could deliver even to Romania. But to his great disappointment, they called him back the day before Valentine's Day, to let him know that they had not succeeded in getting through to their contact at the destination in Romania, and so would be unable to fulfil his order, and thus were refunding his money.

Apparently, somewhere they got their wires crossed, because the order did in fact get through. And so I had the lovely surprise of receiving more flowers than ever before or since in my life, while my then fiance had the experience of disappointment, followed by confusion, followed by surprise, and then delight that I had in fact received the flowers. And we were both happy when we realized that apparently neither of us had had to pay for them!

I hope you have a Happy Valentine's Day, filled with memories that you will recall happily for years and decades to come!


Sunday, January 31, 2016

How To Make a PERFECT Apple Pie


This apple pie is simply delicious. There are obviously lots of different and yet perfectly good ways to make an apple pie. But the results of this recipe are particularly exquisite, and make the perfect culmination to a special meal. More than 20 years ago, when I lived in England, I learned an excellent pie recipe from a professional chef, which I then further developed and improved into the one I am sharing here. The key to a really good pie is the crust. It is made from milk, flour and butter (at least 80% fat). You can make this crust for any fruit pie. If the fruit in the pie is of a kind that is juicier than apples are, simply use more corn starch (see the recipe below).

For the crust you need:

1 stick butter (125 g)
8 oz all purpose flour (240 g)
2oz (50 ml) cold milk
a pinch of salt

Place the flour, butter, and salt in a bowl, and with your hand crumble the butter together with the flour until it is all like a sandy mixture. Add the cold milk and mix it for few minutes until the dough is sticking together. Divide it in two unequal parts (1/3 in one ball of dough and 2/3 in the other).

Leave the dough at the room temperature while you cook the apples.

You need 2 lb (1kg) apples (Granny Smith, Jonathan, or any hard and tart variety)
1 1/3  cups of sugar (300 g)
1 Tbsp of lemon juice
1 tsp of cinnamon powder

1 Tbs corn starch


Peel the apples and cut them into small pieces. Place them in a pan together with the sugar and lemon juice. Turn the heat on medium. Stir it until it leaves a little juice, then place the lid on and leave it to simmer for 3-5 minutes until the apples soften just slightly. 


Then add the cinnamon powder and stir it once or twice. You do not want the apples mushy, so try not to stir them too much. Now they are ready to be put into the pie crust.

Turn the oven on at 425° F (230°C). 

In the meantime, on a floured surface with a rolling pin stretch the bigger ball of dough into a round shape and put it on a 9 1/2 inches oven-proof glass dish. Put the corn starch onto the unbaked pie crust in the dish and spread it evenly over the bottom. Then gently pour in the apples. 


Stretch the second ball of dough and place it on the apples. If you have a pastry cutter you can make holes in it first, as I did, or you can just simply poke it with a fork so the steam can get out. With your fingers, stick together the bottom and the top sheet of dough. Sprinkle 1-2 Tbsp of sugar on top of the pie.


Place the pie on the top rack of the oven at 425° F (230°C) and bake it for 20 minutes, then reduce the temperature to 350° F (150°C) and bake it for another 20 minutes. 

Turn off the oven and let it stay there for another half an hour. When it is ready it should look like this:


Serve it with whipped cream or vanilla ice cream.